Blender stylized water shader (tutorial-based)
Notes from building a stylized water material in Blender. This is the setup I used for quick look tests and easy shader tweaking.
- Date
- Jan 1, 2026
Source tutorial (credit)
This shader is based on the workflow from the tutorial below. I followed it closely, then tweaked values for my own look tests.
Stylized Water in Blender — tutorial
Look tests (still frames)
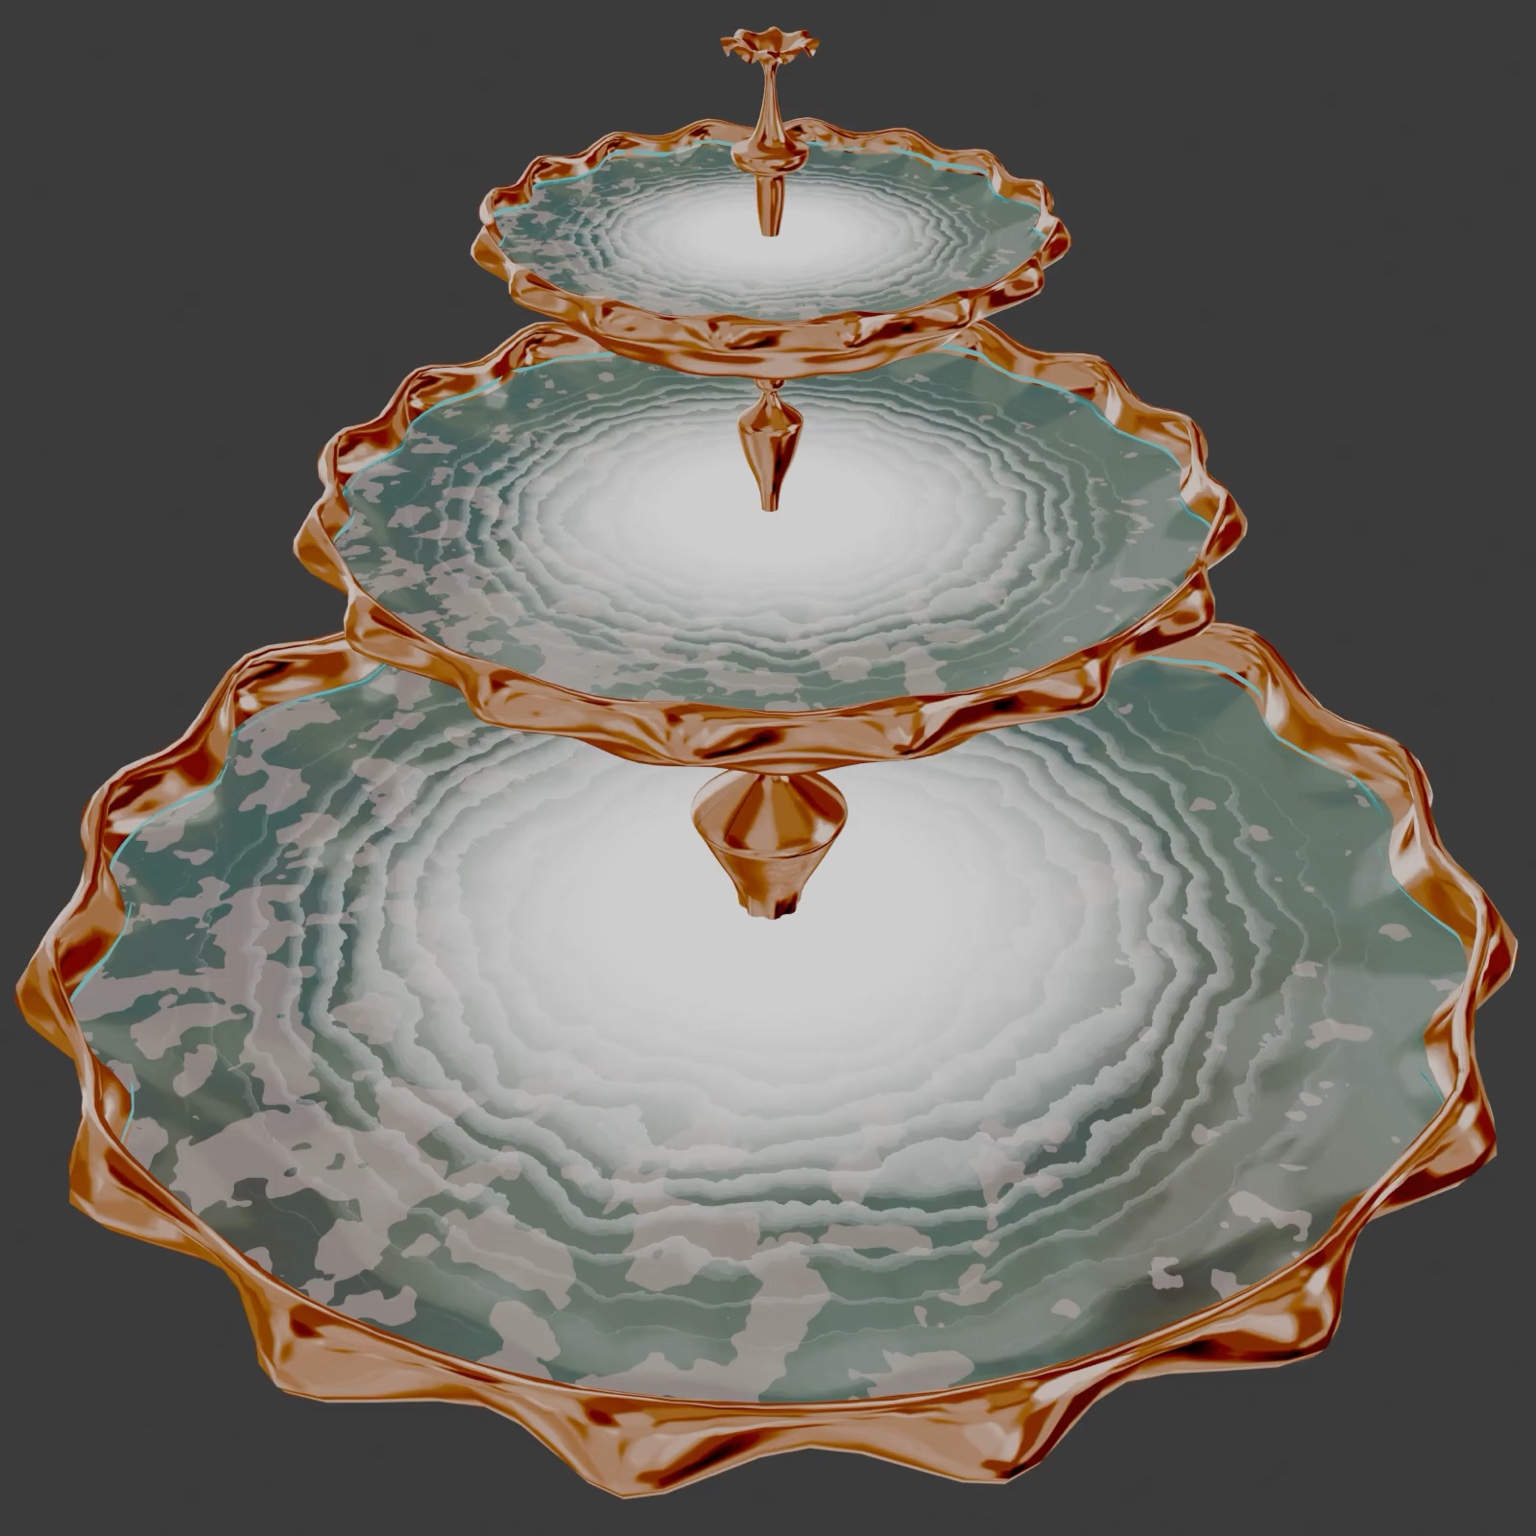
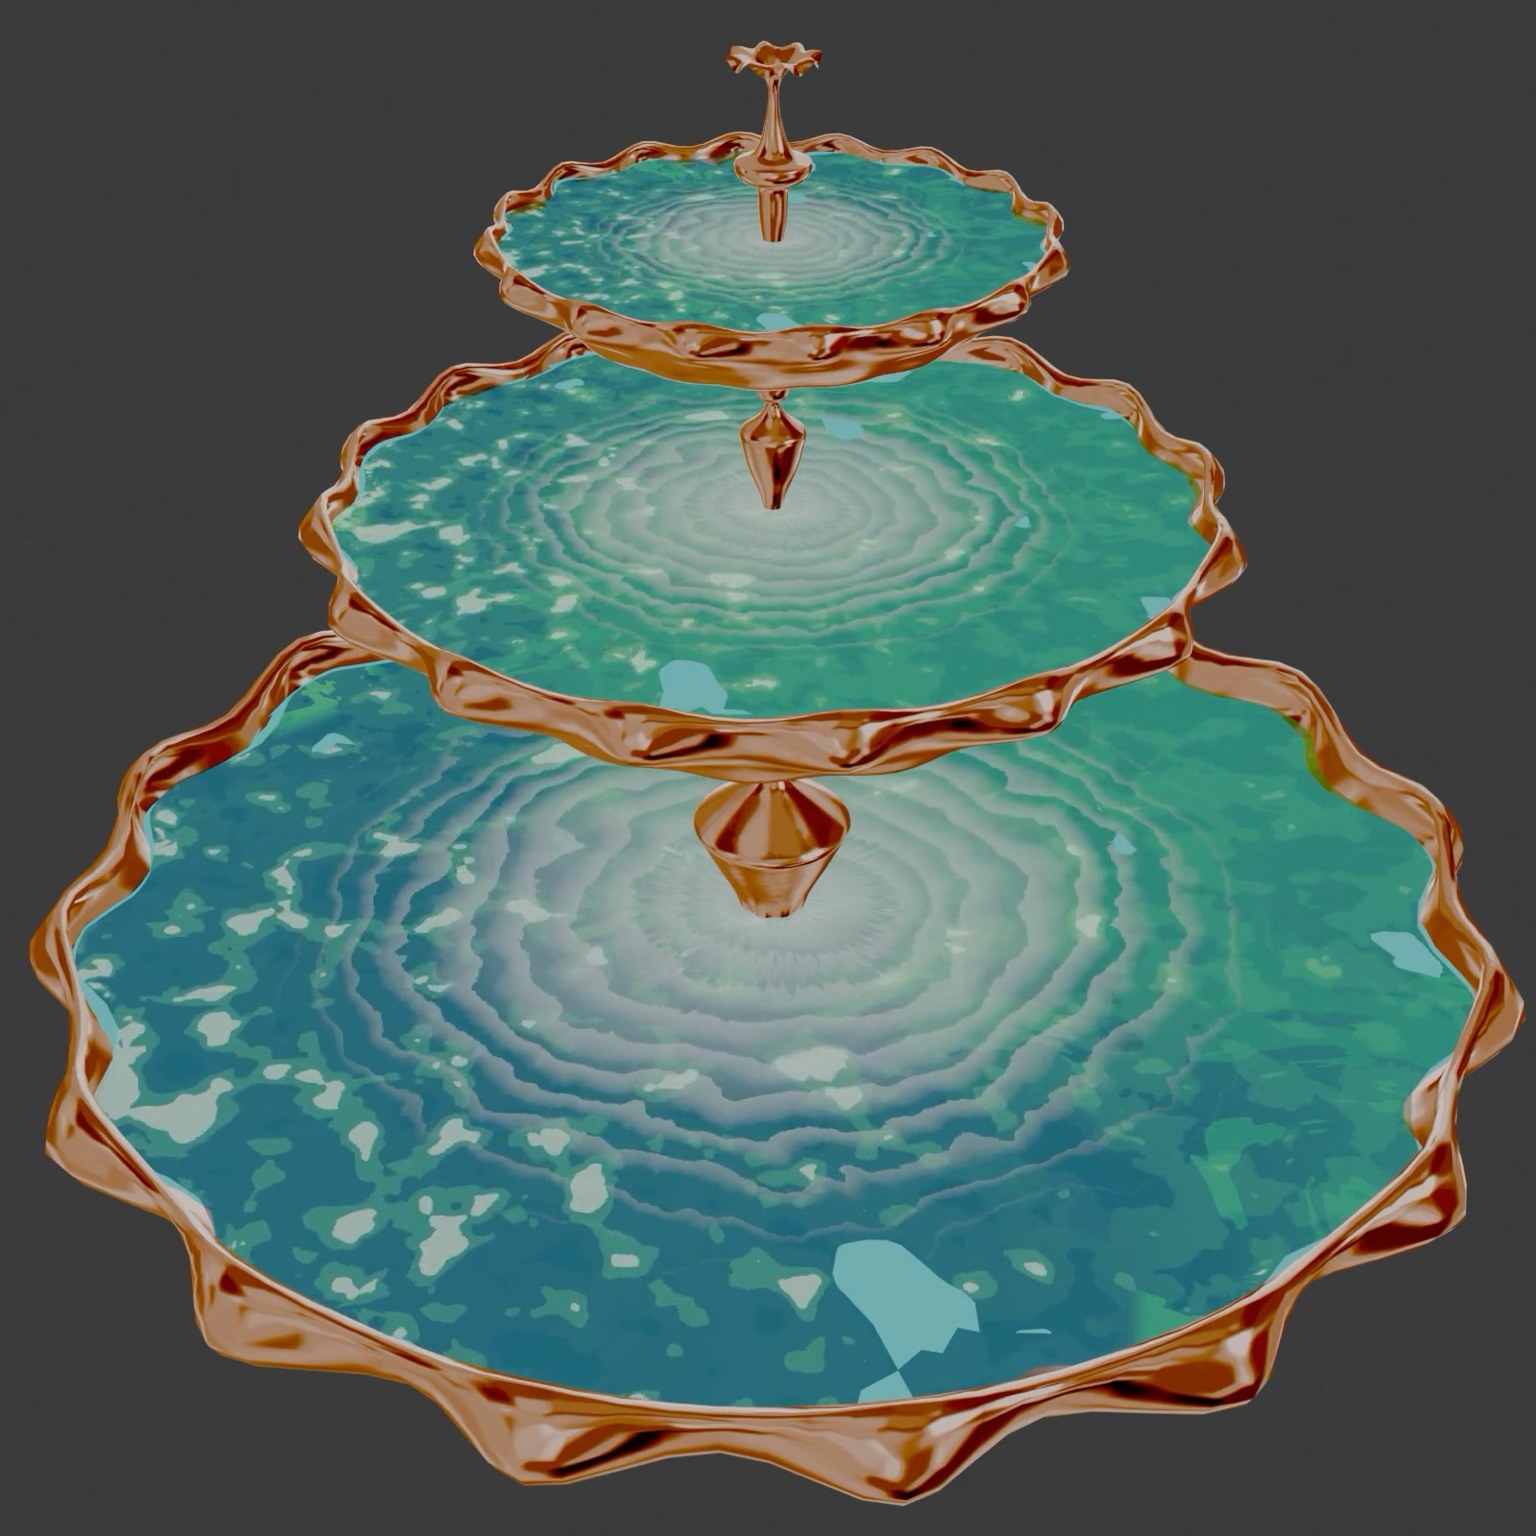
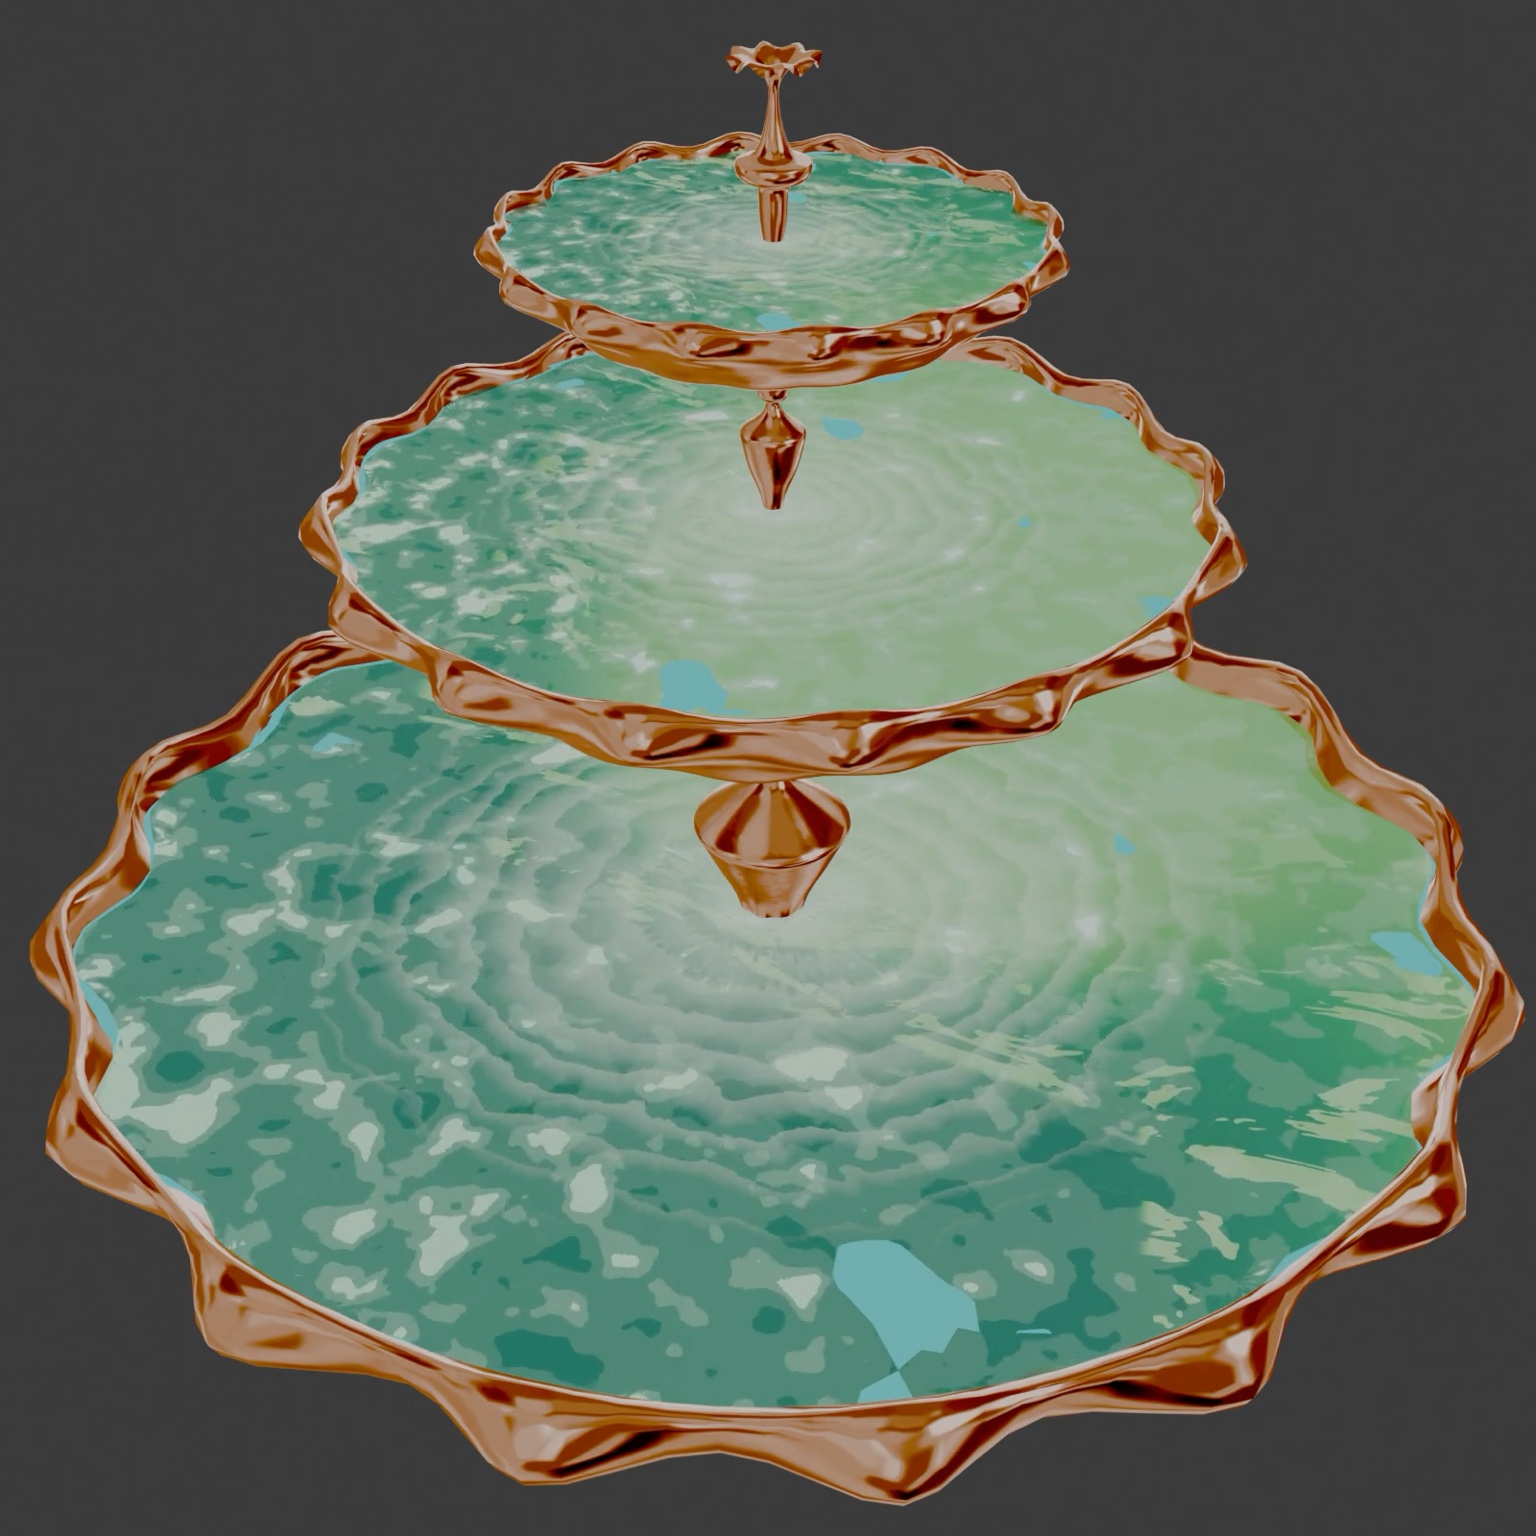
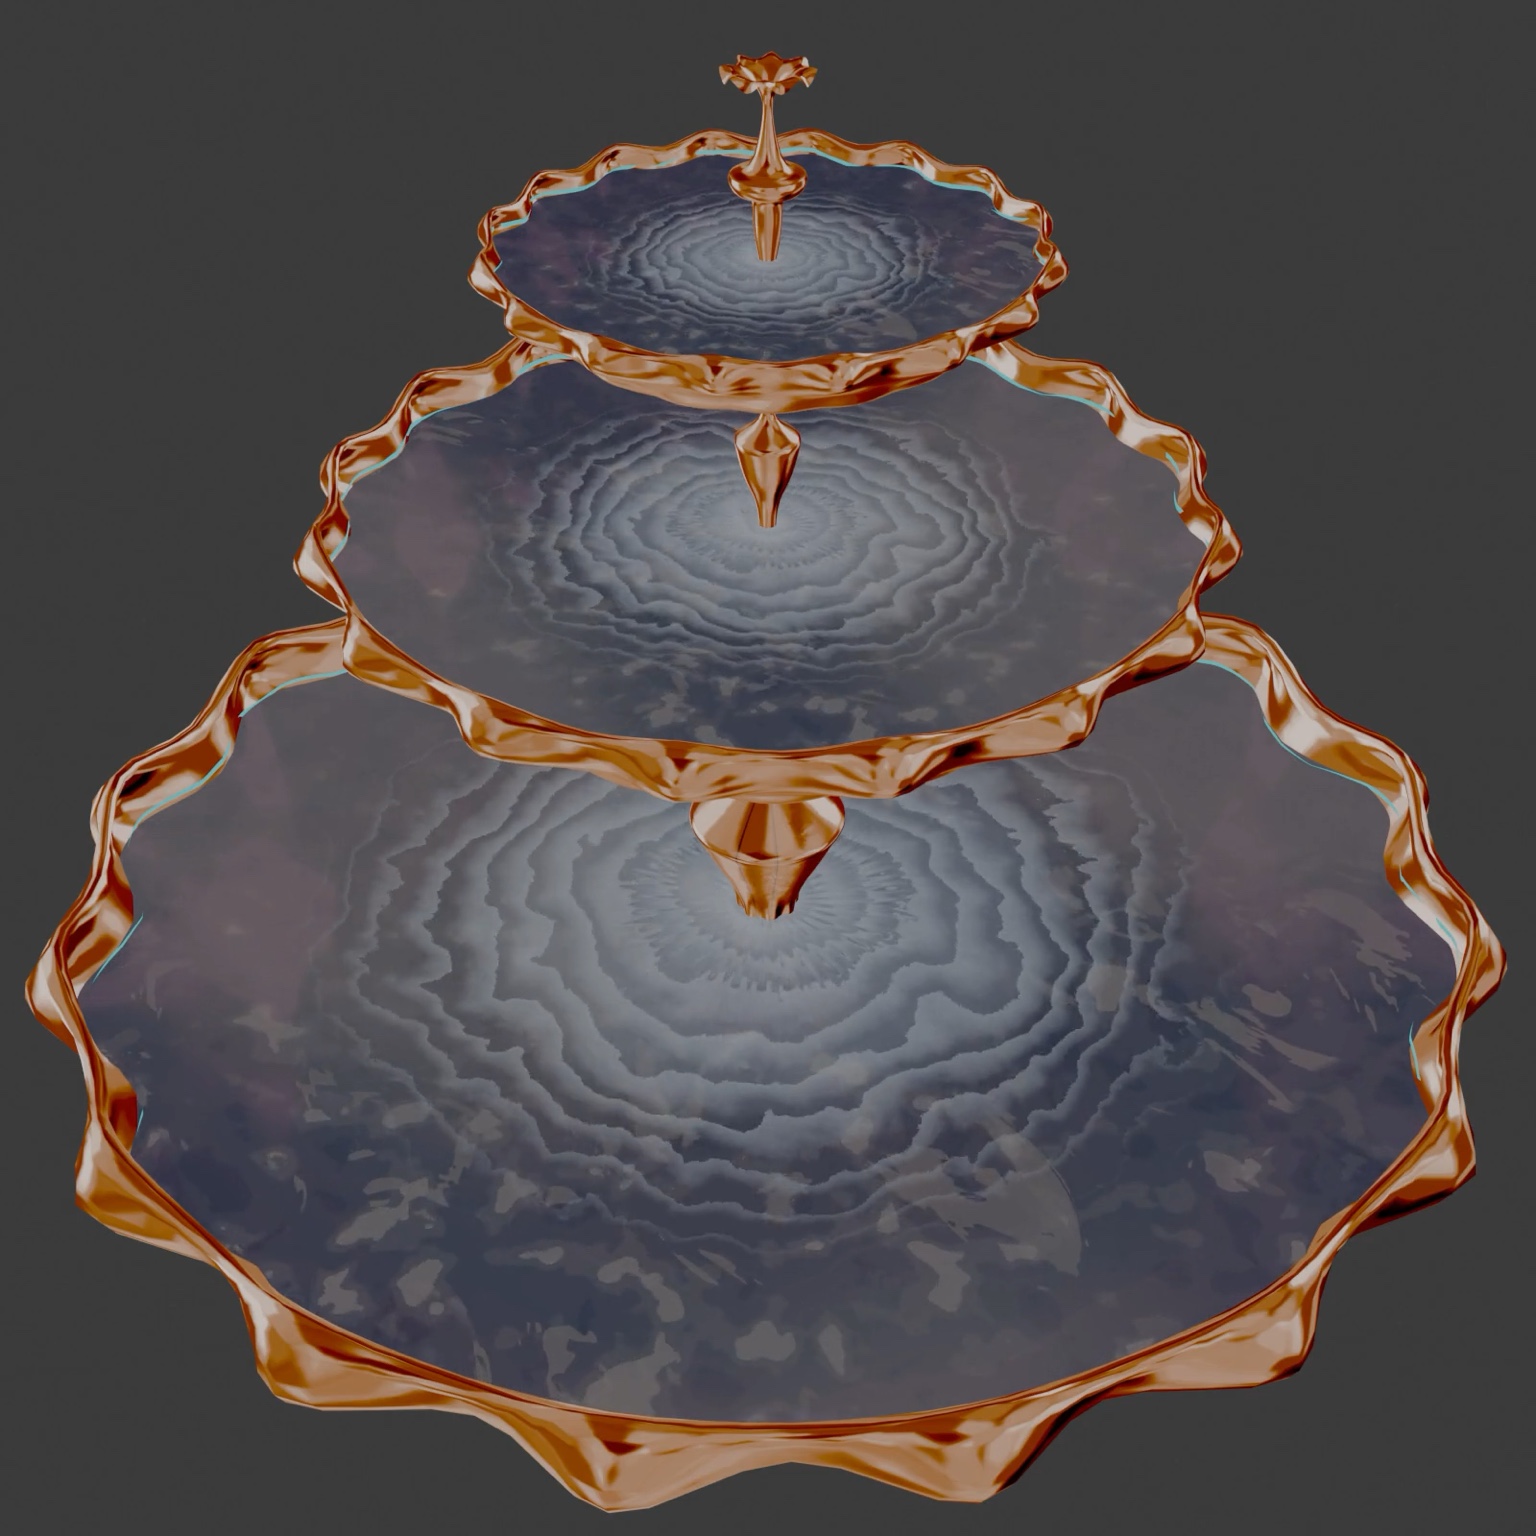
These are the four variants I liked most. Same node graph. Mostly different ramp positions, mix factors, and texture scales.
Look tests (videos)
Same four looks, but animated. These are short clips so I can judge motion, highlights, and how the ripples read over time.
Node graph overview
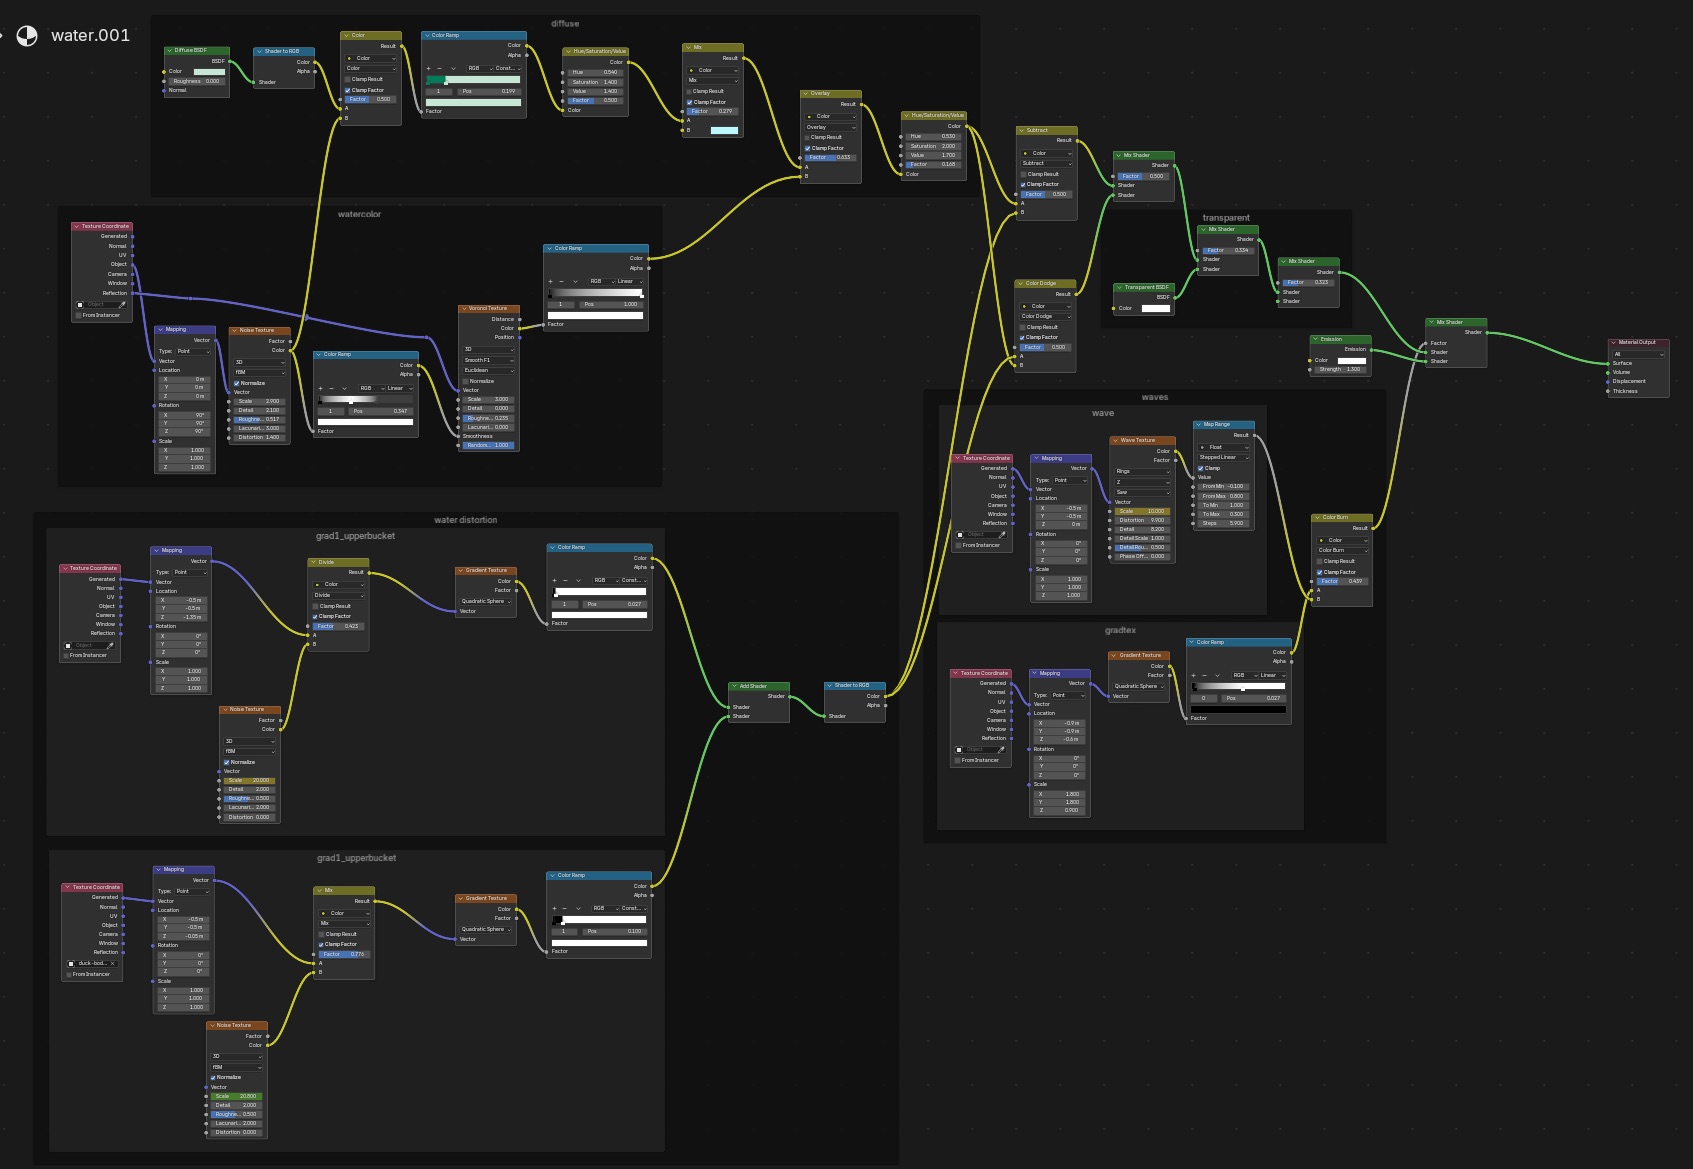
This is the full material layout. I split it into readable chunks: a base diffuse banding pass, a watercolor breakup pass, a distortion pass, and a wave/ripple pass. Then everything gets combined and pushed through the final output mix.
Diffuse bands
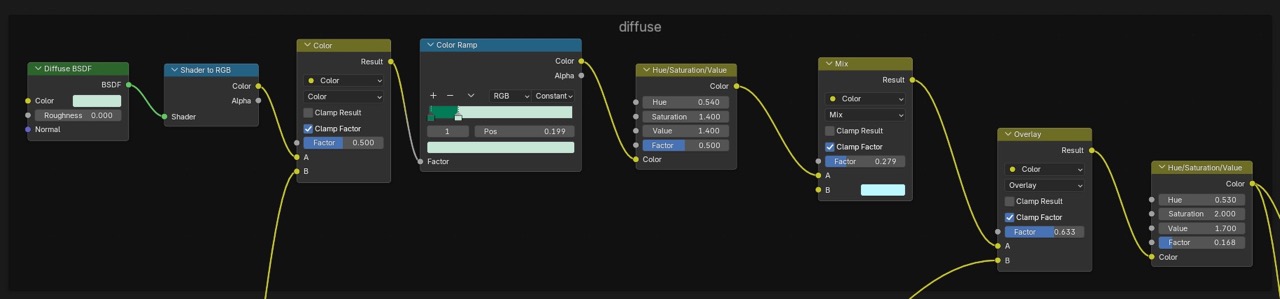
This part builds the base stylized shading. The idea is simple: convert lighting into bands with a ColorRamp, then push color a bit with HSV and controlled blends. If the water looks flat, this is usually where I fix it first.
Watercolor breakup
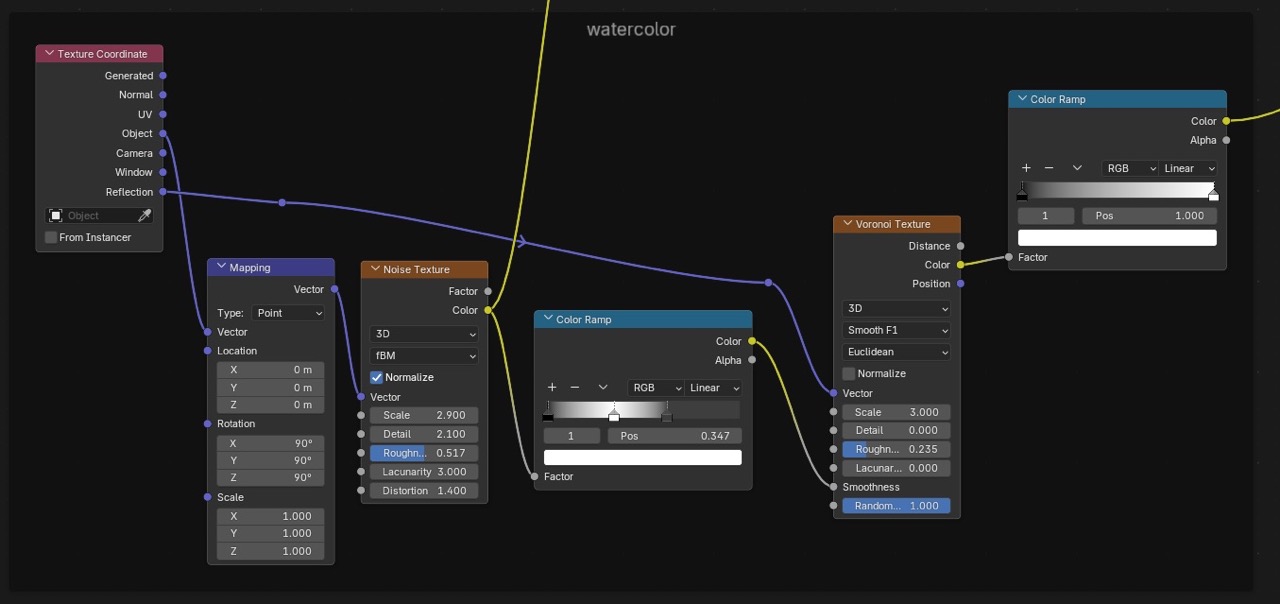
This pass adds the blotchy, paint-like variation. Noise feeds into Voronoi, and the ramps decide what becomes “paper texture” vs. what stays clean. The quickest knobs here are Noise scale, Voronoi scale, and both ramp contrast levels.
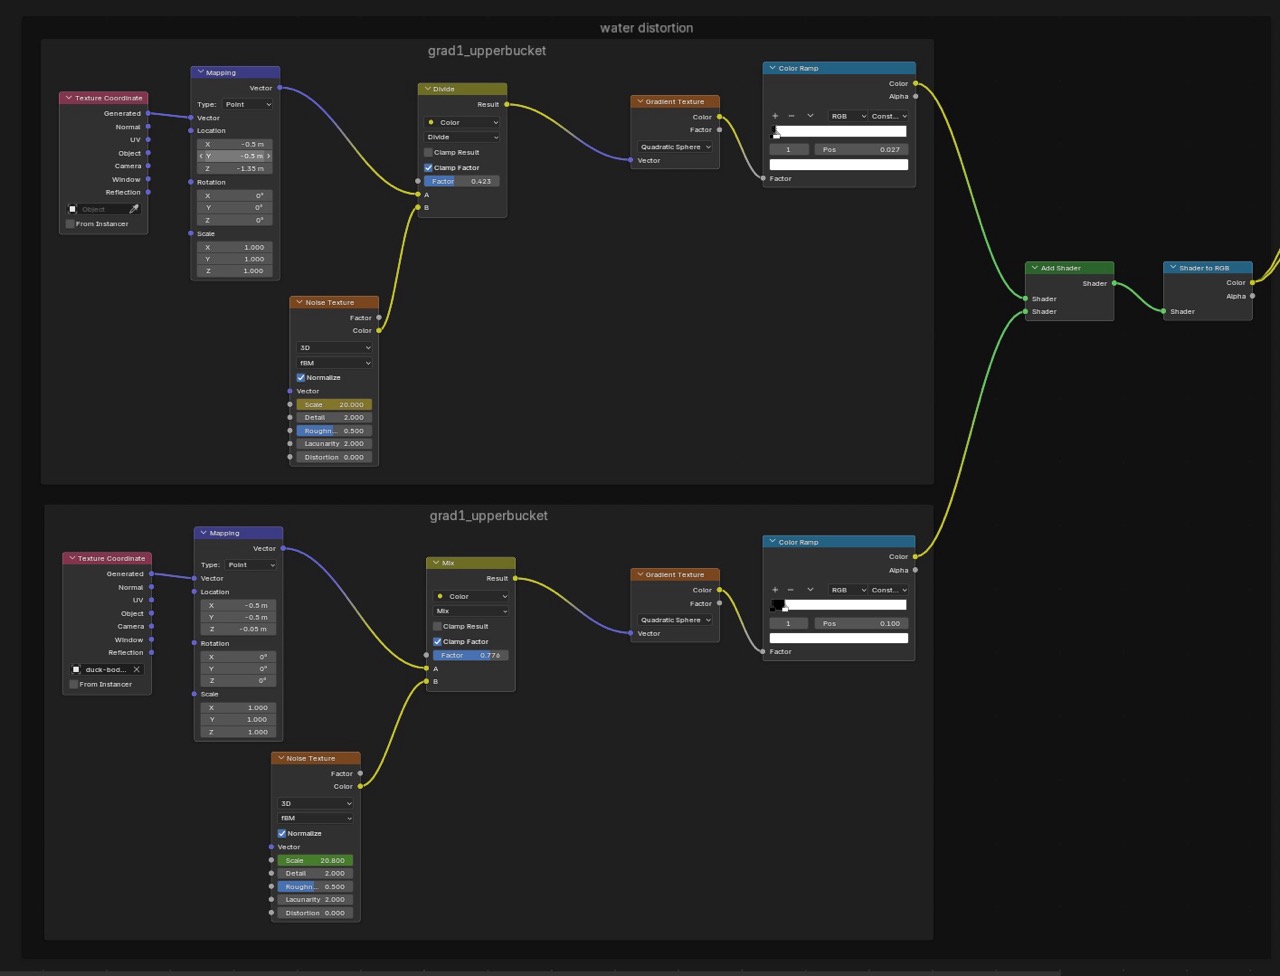
Water distortion
This section fakes depth and swirl by warping the pattern with gradients and noise. I treat it like a “push/pull” layer: subtle values give a nice drift, heavy values start looking like marble. Keep it restrained unless you want chaos.
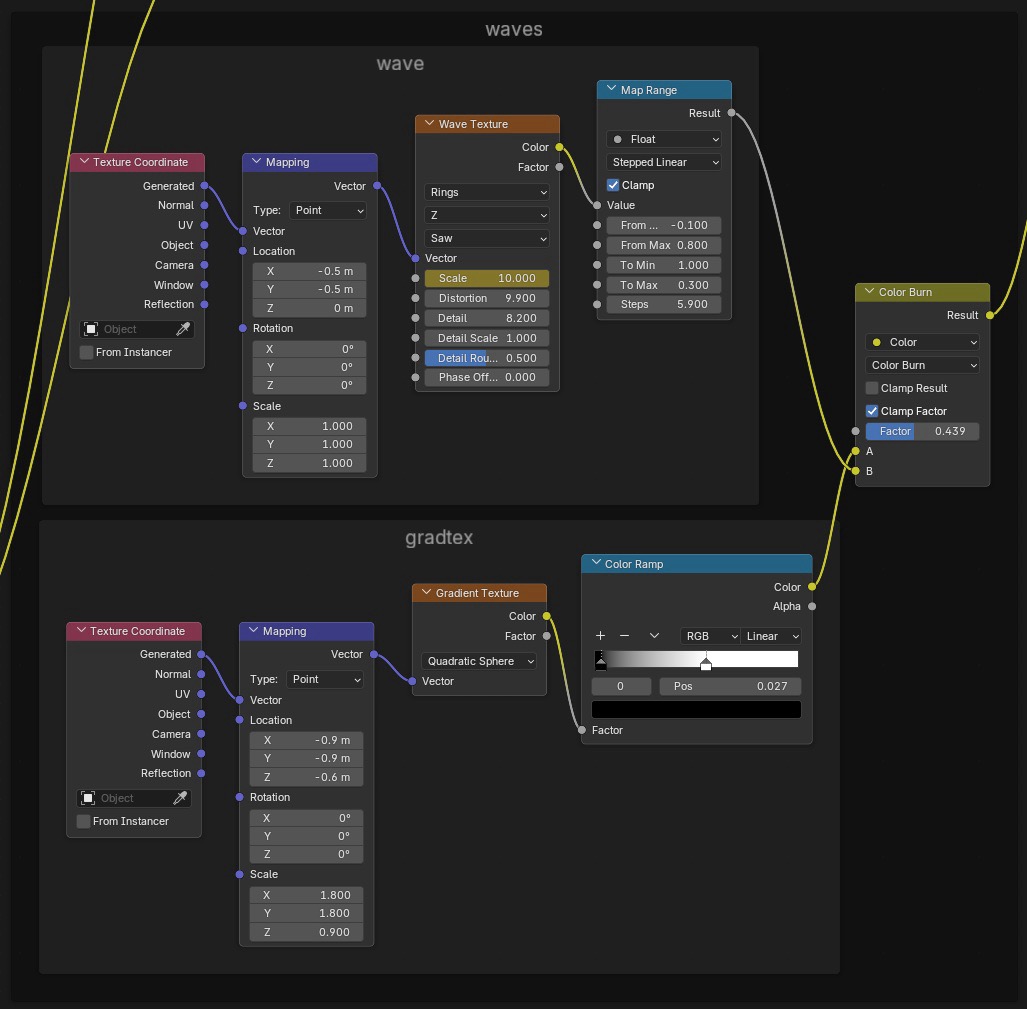
Waves and ripples
This is where the ripple rings come from. Wave Texture drives the concentric pattern, then Map Range + ramps snap it into stylized steps. Scale controls ring spacing. Distortion controls how “organic” the rings feel.
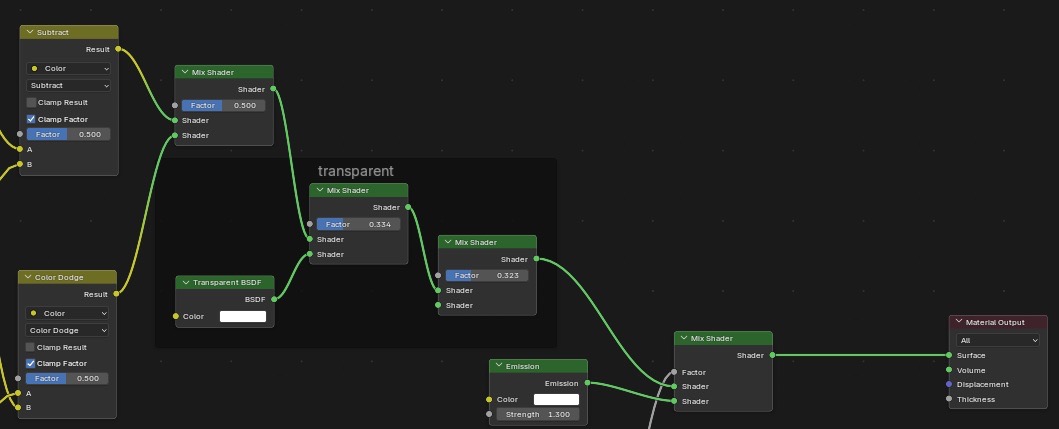
Final mix and output
After the groups are built, I combine them and balance the final read. This is where I decide how much glow vs. transparency I want, and how strong the stylization should be. If I’m doing multiple looks, I only tweak the ramps and a few mix factors.